
Have a Question?
Software containers ON the ARC
Containers offer several advantages over traditional installations. First, once a container is built and tested any system that supports the container type can run the image. Using publicly available containers allows users to bypass many of the difficulties associated with traditional software compiling. As containers can be as specific or non-specific as the creator decides, multiple different versions of the same software can be stored on a system without worrying about dependency conflict.
If there is a software that you would like to run on the cluster that currently unavailable as a module and you are not interested in using containers your other options are:
-
Request the software to be installed as a module by ARC staff.
-
Compile the software from source in your home directory.
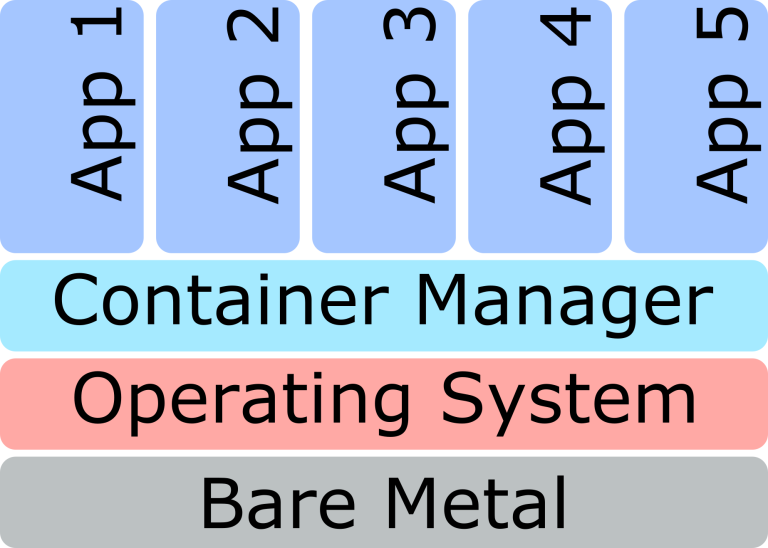
How to get and use containers
Container images can be obtained in two different ways; purpose-built on a local machine and exported to the cluster or obtained from an official source (i.e. DockerHub or NVIDIA’s NGC).
Singularity (https://sylabs.io/guides/3.5/user-guide/introduction.html) is a container manger optimized for use in HPC environments, and is the container manager available on both arcc1 and arcc2. Here we have compiled some basic commands to get your started using Singularity at the ARC.
Singularity basic usage
Singularity can be loaded as a module on arcc1 using the “module load singularity” command. You can run “singularity help” to get a list of singularity commands and a short description.
If you do not already have your container on the ARC singularity can be used to “pull” an image from an public directory. Two common sources for these images are DockerHub (https://hub.docker.com/search?type=image) and the Sylabs cloud Library (https://cloud.sylabs.io/library).
The pull and build commands can be used to download pre-built images from external resources.
Pull, when used on native Singularity images, simply downloads the referenced image to your local computer.
$ singularity pull library://syslabsed/linux/alpineThis will result in an image file, alpine_image.sif in this case, being downloaded for use. When pull is used on images of different formats such as a docker image the docker image layers must be combined into a singularity image for use. For example:
$ singularity pull docker://godlovedc/lolcowThis command, just like the previous singularity command will result in a singularity image being pulled to your local machine.
The build command works similarly to the pull command with the exception that images are built to the latest singularity image format after being downloaded. Functionally they operate similar to the pull commands with the exception that a name for the images must be specified.
$ singularity build alpine.sif library://sylabsed/linux/alpine
$ singularity build lolcow.sif docker://godlovedc/lolcow
After being built singularity containers can be interacted with using the shell, run, and exec commands.
Shell as the name suggest creates a shell inside the container where you can interactively submit commands to the program you are using. For example to create, load, and get the version of a GROMACS image we would run:
$ singularity build gromacs.sif docker://gromacs/gromacs
$ singularity shell gromacs.sif
Singularity> gmx -version
...
...
Singularity> exit
$
Interactive sessions in containers are ideal for testing and light computing, but in order to make full use of containers on HPC systems the exec command should be used.
The exec command can used to run simple to complex jobs inside of a container without interactive user input. For the typical batch job on an HPC system exec will be the most useful command. If we want to run the same GROMACS commands as above we could run:
$ singularity build gromacs.sif docker://gromacs/gromacs
$ singularity exec gromacs.sif gmx -version
...
...
$
Inside batch scripts you can used typical bash syntax to pipe multiple lines worth of commands for the container to run. For instance a GROMACS simulation cycle, that utilizes GPU acceleration, in a batch file using the GROMACS container could look like this:
#!/bin/bash
#
#SBATCH --job-name=example_job
#SBATCH --nodes=1
#SBATCH --time=01:00:00
#SBATCH --partition=gpu
#SBATCH -o filename_%j.txt
#SBATCH -e filename_%j.err
cd /home/user/gromacs-job
module load singularity
singularity run --nv gromacs_2019.1.sif << EOF
#gromacs commands here
gmx grompp -f minim.mdp -c 1AKI_solv_ions.gro -p topol.top -o em-gpu.tpr
gmx mdrun -v -deffnm em-gpu -nb gpu
gmx grompp -f nvt.mdp -c em-gpu.gro -r em-gpu.gro -p topol.top -o nvt-gpu.tpr
gmx mdrun -deffnm nvt-gpu -nb gpu
gmx grompp -f npt.mdp -c nvt-gpu.gro -r nvt-gpu.gro -t nvt-gpu.cpt -p topol.top -o npt-gpu.tpr
gmx mdrun -deffnm npt-gpu -nb gpu
gmx grompp -f md.mdp -c npt-gpu.gro -t npt-gpu.cpt -p topol.top -o md_0_1-gpu.tpr
gmx mdrun -deffnm md_0_1-gpu -nb gpu
EOF
echo "Gromacs Job End"
Creating custom containers for use on the Arcc
Custom containers can be uploaded to a user’s home or scratch directory and used to run software that is difficult or impossible to run on the cluster. Below are some guidelines for creating a container using Singularity. These steps require that you have:
- Singularity installed locally
- Sudo permissions
- Some Singularity supported flavor of Linux OS
Basic container creation steps:
1. Create singularity def file (example below) with as much of the container’s info as needed. Docker bootstraps seem to work the best in my experience. Ubuntu is the easiest OS to install in usually.
a. Include your final env variables in the %environment section
b. Include all your apt/yum commands in the %post section
c. Variables that need to be set during installation or build need to be set in the %post section
d. If one of the installed asks for user input include “export DEBIAN_FRONTEND=noninteractive” in the %post section
2. Build sandbox version of image using the command
a. Sudo singularity build –sandbox ./image_sandbox/ image.def
3. Enter sandbox as root user with writeability on
a. Sudo singularity shell -w ./image_sandbox/
4. Install additional packages
a. Apt-get, git, curl, etc
b. Make sure to target directories for the installation that won’t be overwritten on the host or lead to permission errors
i. Avoid /root/home installs
ii. /usr/local installs seem to work
iii. /opt/ installs may also work
c. Exit image
5. Reload image as shell and ensure that changes were written
6. Convert sandbox to image file
a. Sudo Singularity build image.sif ./image_sandbox/
7. Reload and check new image.sif file to ensure functionality
Example singularity .def file
Bootstrap: docker
From: ubuntu:latest
Stage: build
%setup
%files
%environment
export DGD=/usr/local/gdtkinst
export DGD_REPO=/usr/local/gdtk
export PATH=$PATH:$DGD/bin
export DGD_LUA_PATH=$DGD/lib/?.lua
export DGD_LUA_CPATH=$DGD/lib/?.so
%post
export DEBIAN_FRONTEND=noninteractive
apt-get update && apt-get install
-y netcat
NOW=`date`
echo “export
NOW=”${NOW}”” >> $SINGULARITY_ENVIRONMENT
apt-get install -y build-essential gfortran
gfortran-multilib git wget curl libreadline-dev libncurses5-dev libopenmpi-dev
libplot-dev python3-cffi ruby-ffi
%runscript
echo “Container was created $NOW”
echo “Arguments received: $*”
exec echo “$@”
%startscript
~